Event Modeling on prooph board
This page provides a step-by-step guide of how to design an event-driven system using Event Modeling on prooph board. The resulting artifact is called Event Map.
Throughout the guide we’ll use an example from a car rental business.
Start from an Idea
Let’s assume we are a car rental startup team that finished its first Big Picture Event Storming.
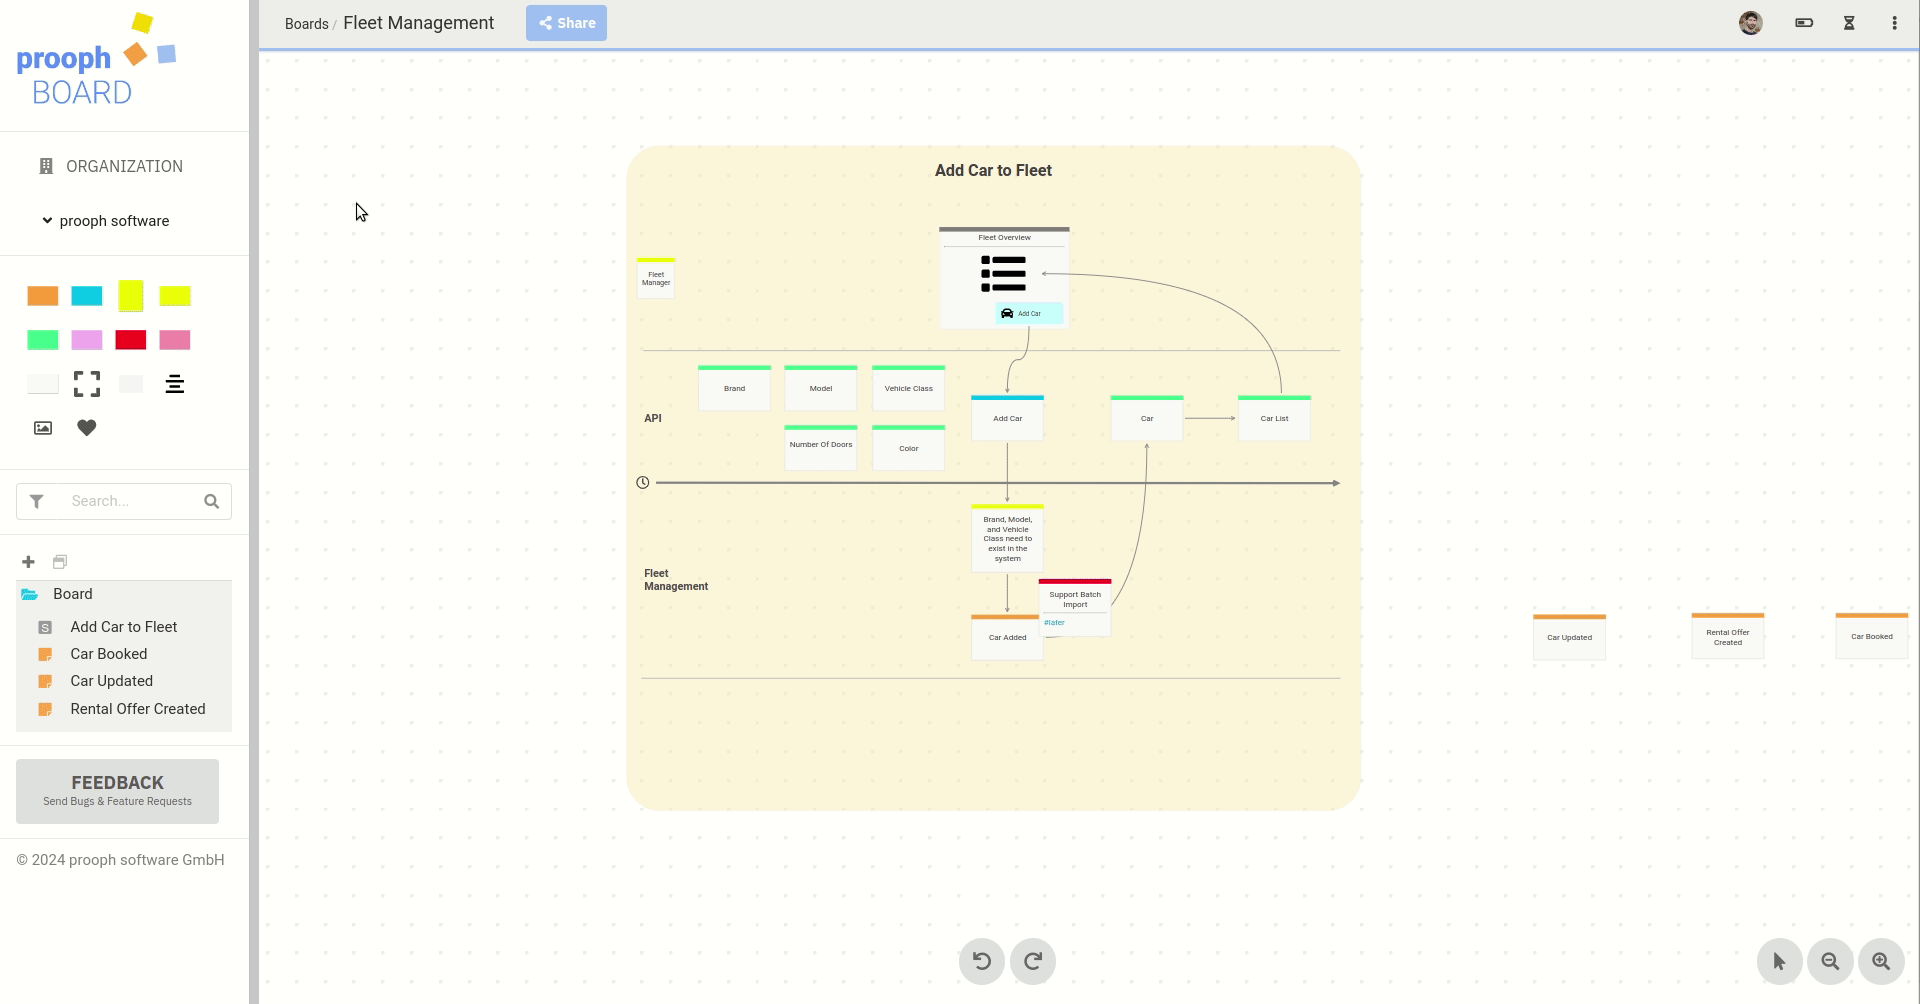
The first module should be some kind of Fleet Management. We need to be able to Add a Car to the fleet and Create a Rental Offer for it so that it can be booked by customers.
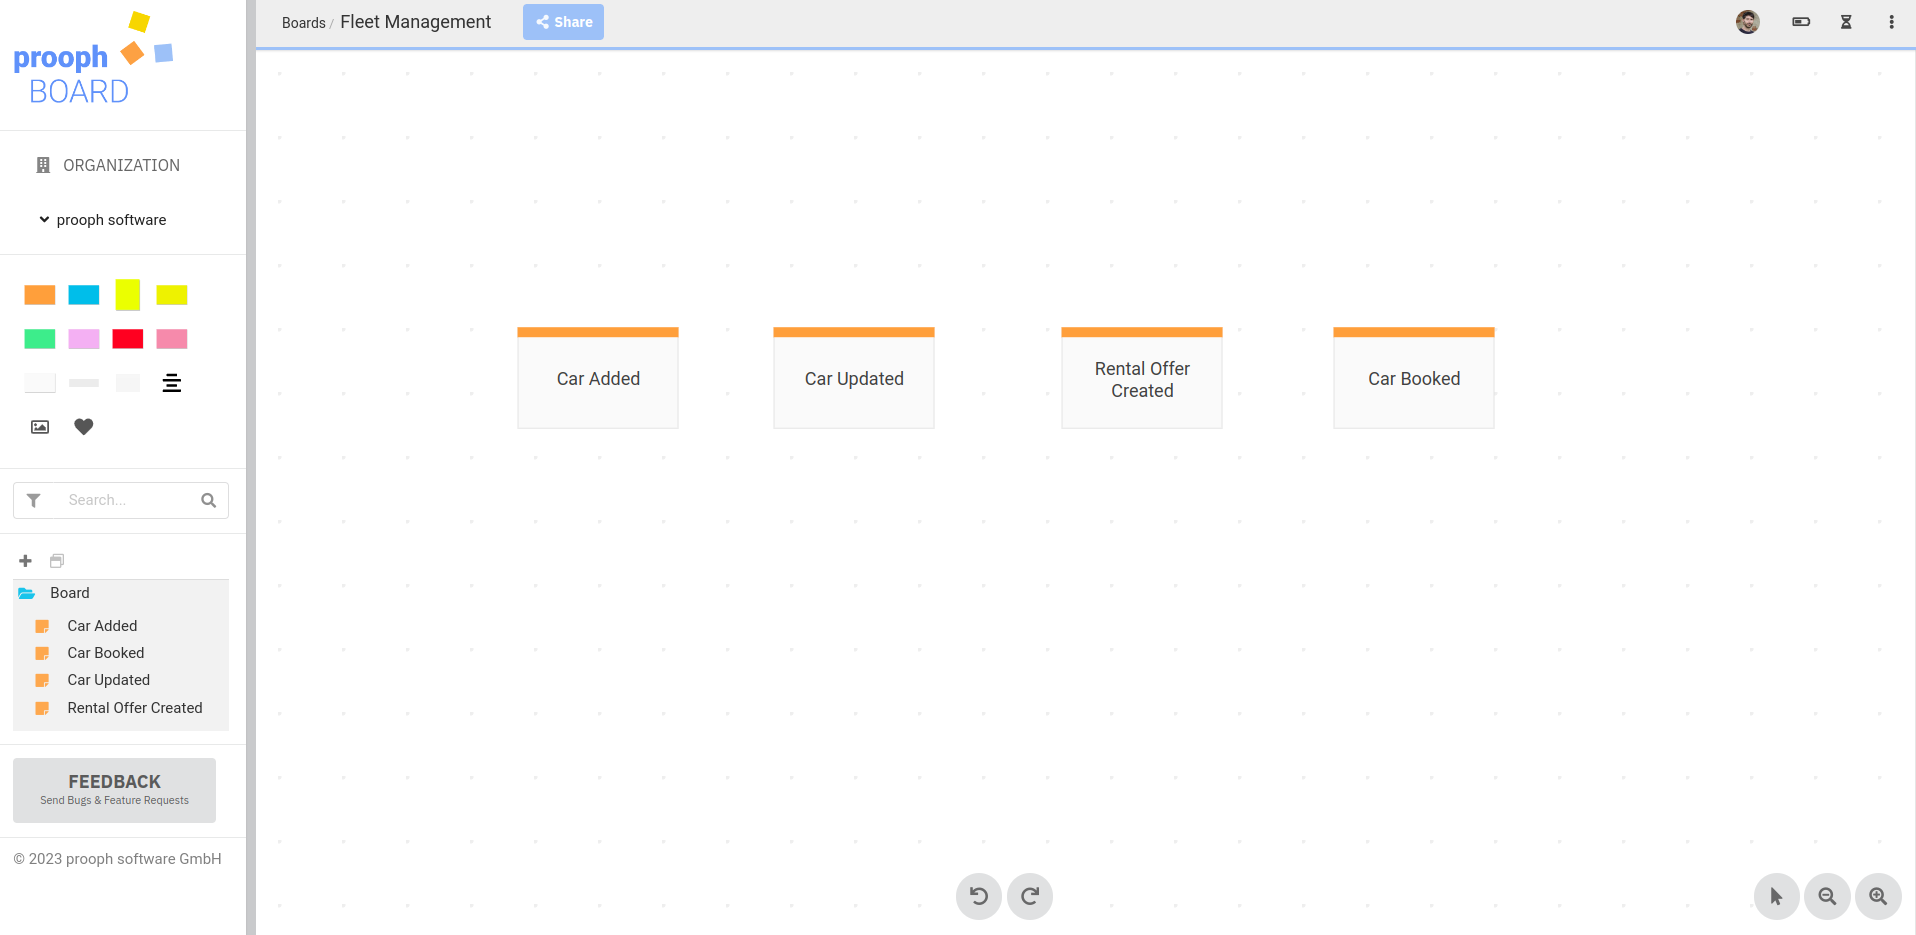
An Event Modeling Design session will help us with the details. To get the ball rolling, we look at each event from above and think of it as a Slice of the new system.
Where - Identify the Entry Point
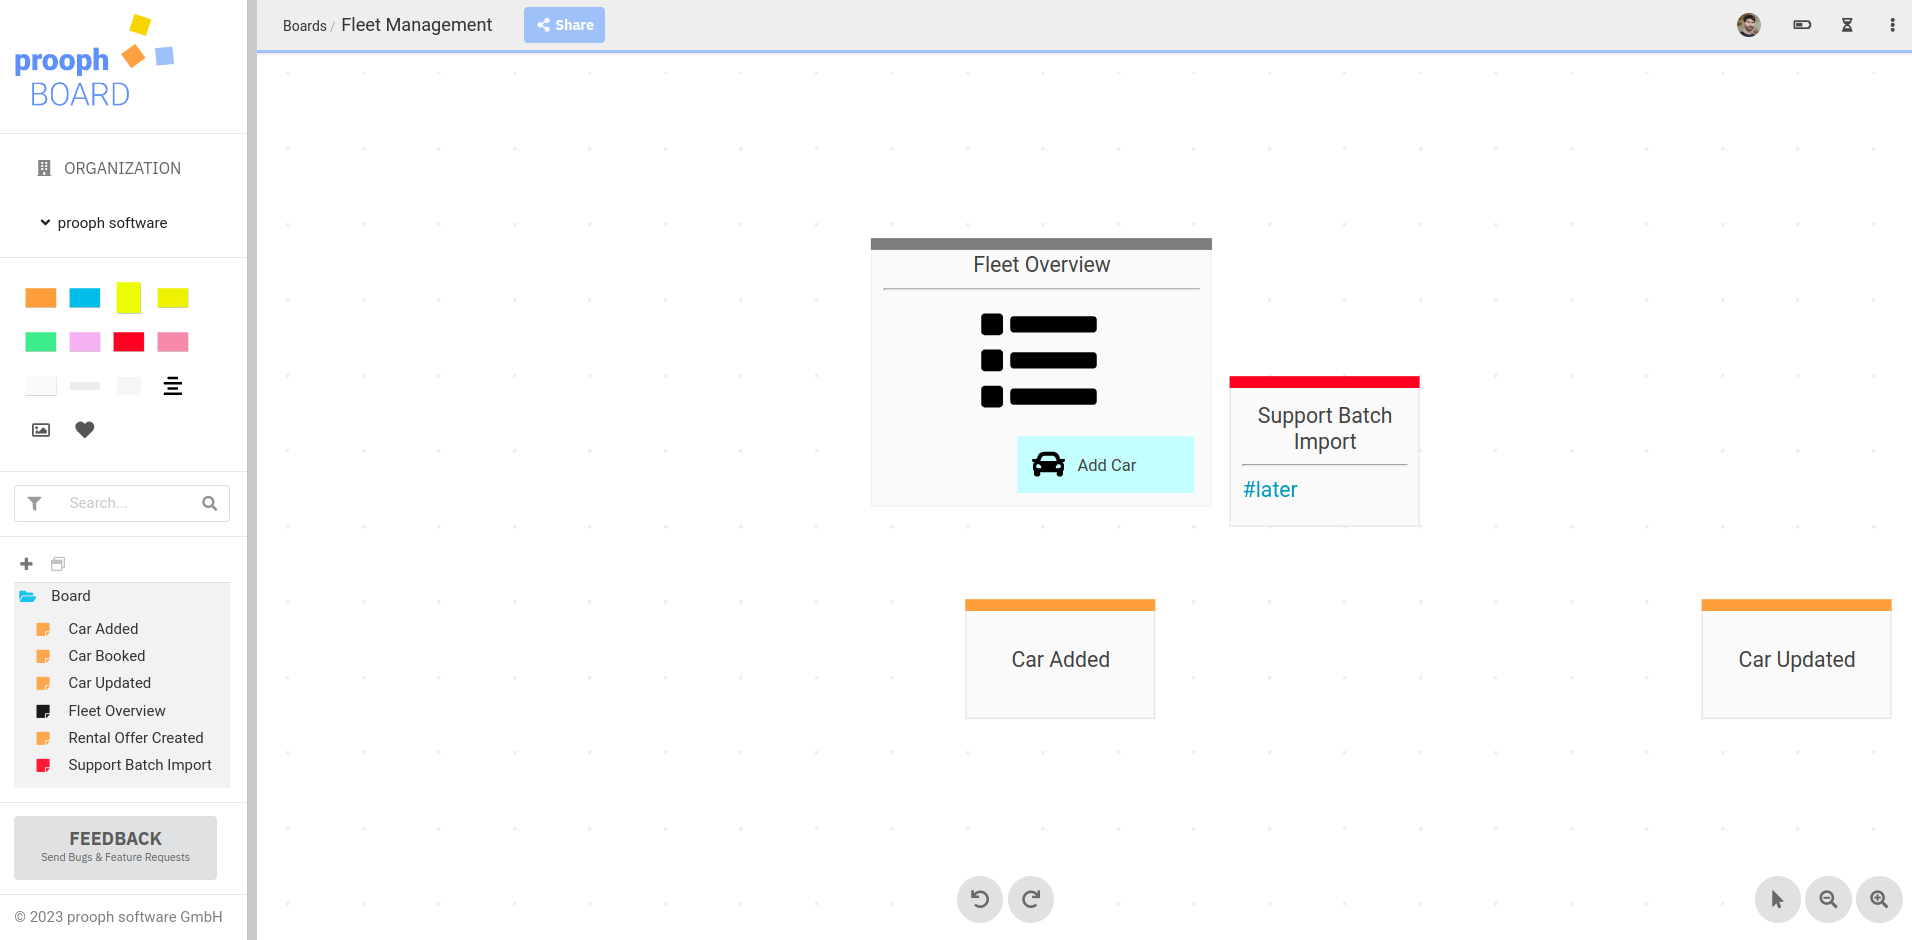
Adding a car to the fleet will be a manual task done by the fleet manager. In later iterations we can think about batch imports and derive car details from a third-party service, but for now we keep things simple. This ensures a fast feedback loop.
So we start with a UI Card to sketch a rough idea of a UI screen showing a list of cars in the fleet and a button to add a new car.
Instead of using UI cards, some teams prefer a more visual approach by uploading screenshots from wireframes (especially when UX is part of the team). That’s totally fine. The only advice is that those wireframes should not be too detailed as this can become a bottleneck in the flow.
Who - Identify the Actor
A Slice either represents an action that a user can perform in the system or an automated process step.
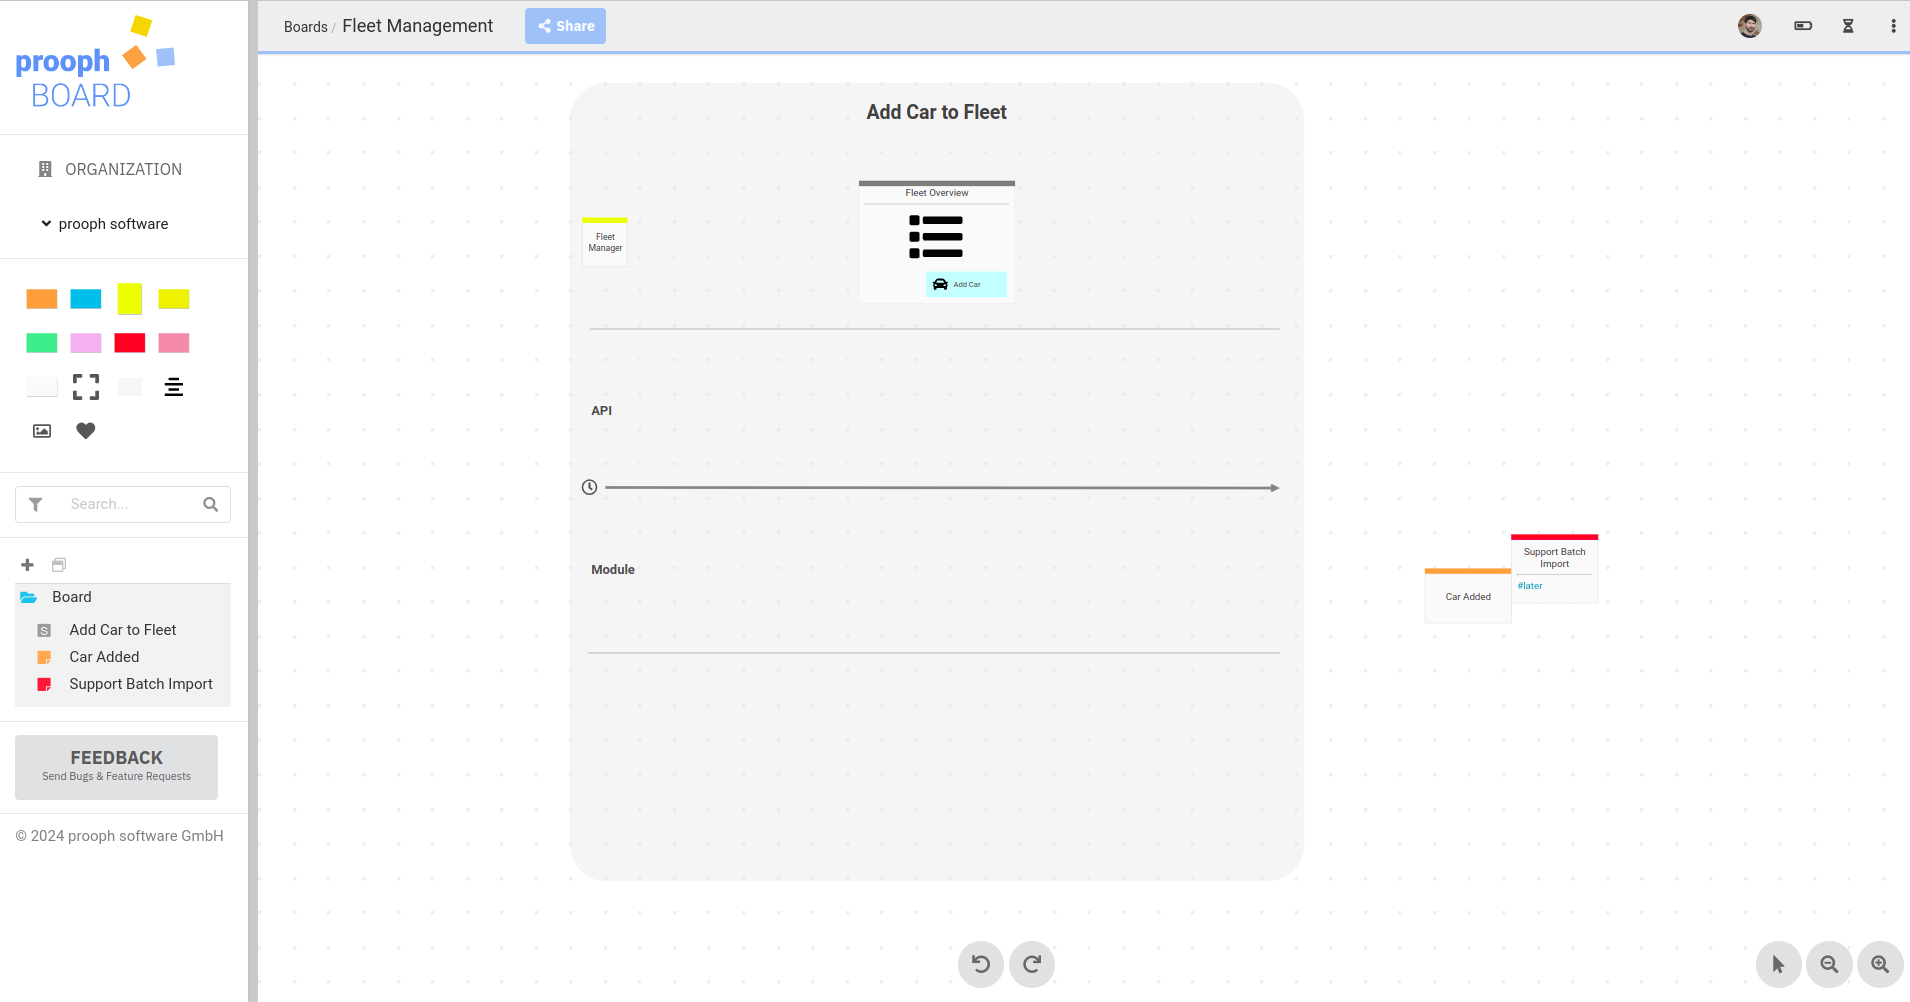
As a Fleet Manager
I want to add a car to the fleet
so that it can be booked later.
Pull a new Slice from the sidebar. Each Slice has one or more user lanes with an Actor Card as a label. Put the UI card into a fleet manager lane.
Slices have changed. The swimlanes are now handled by a dedicated Swimlanes Frame and no longer part of a Slice like shown here on the screenshots. We’ll update the wiki page soon.
What - Identify the Intention
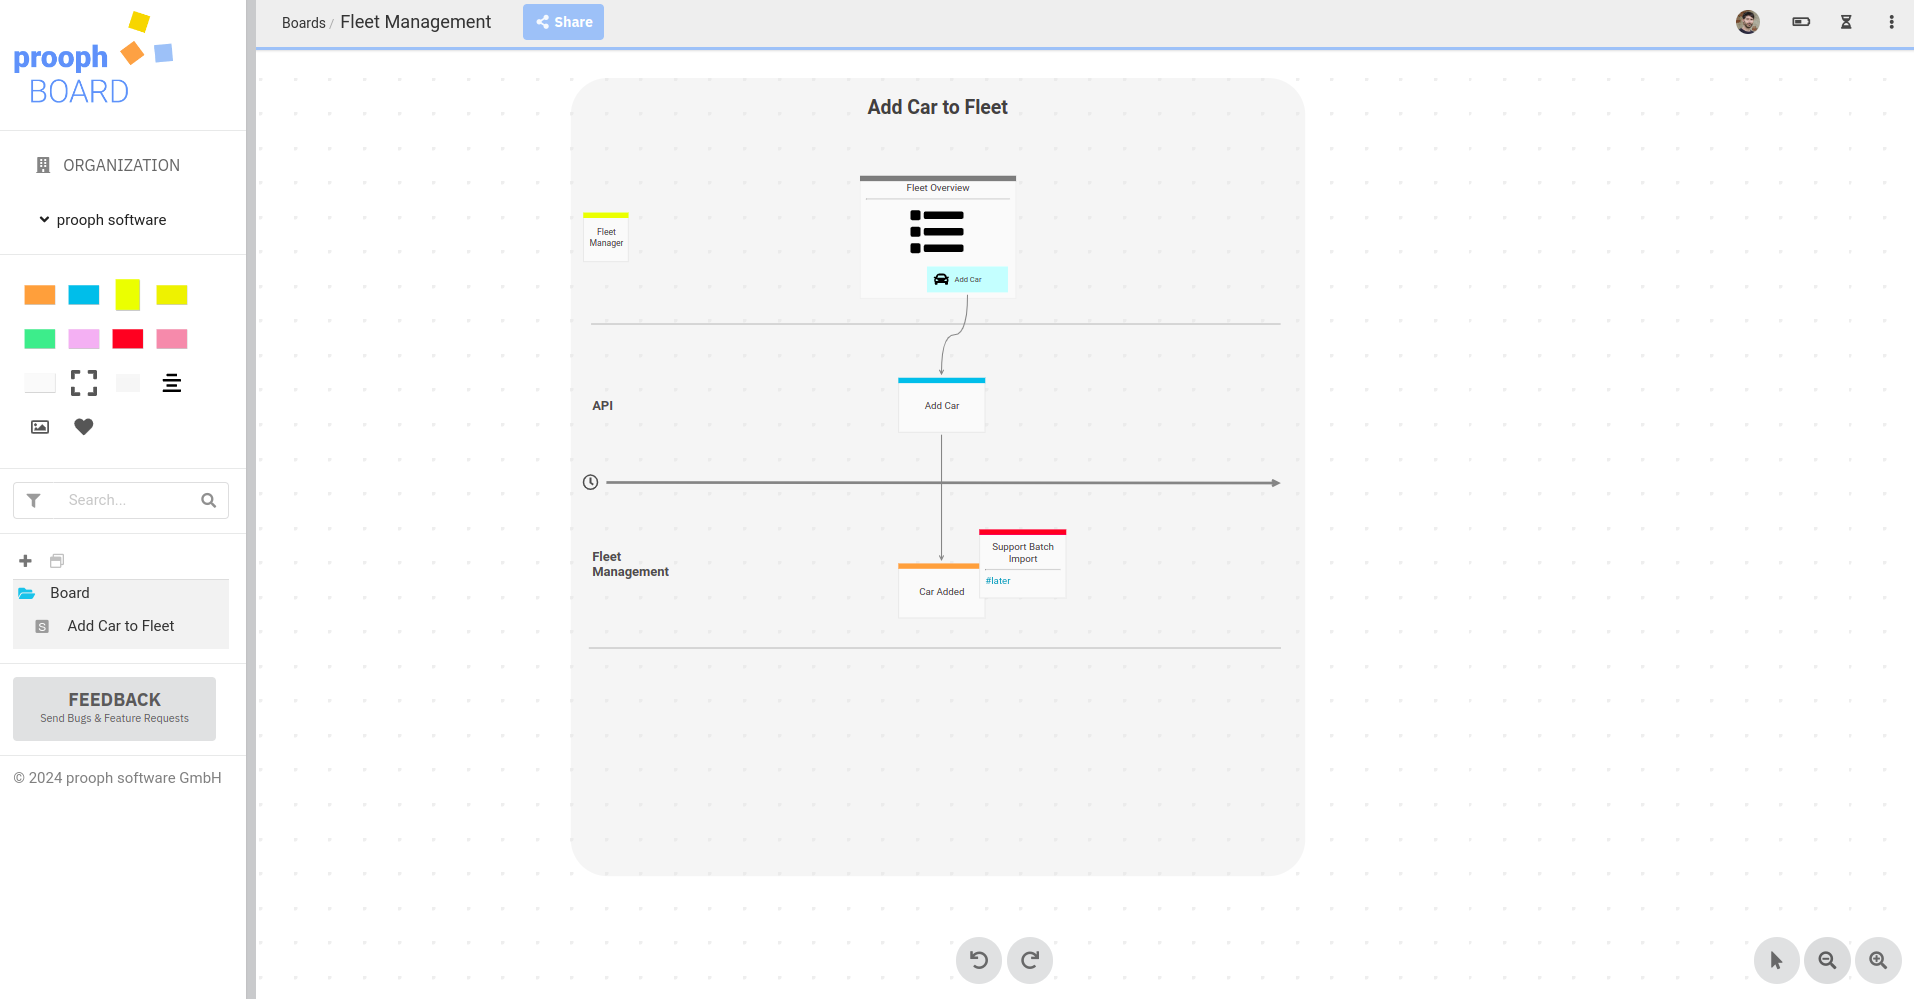
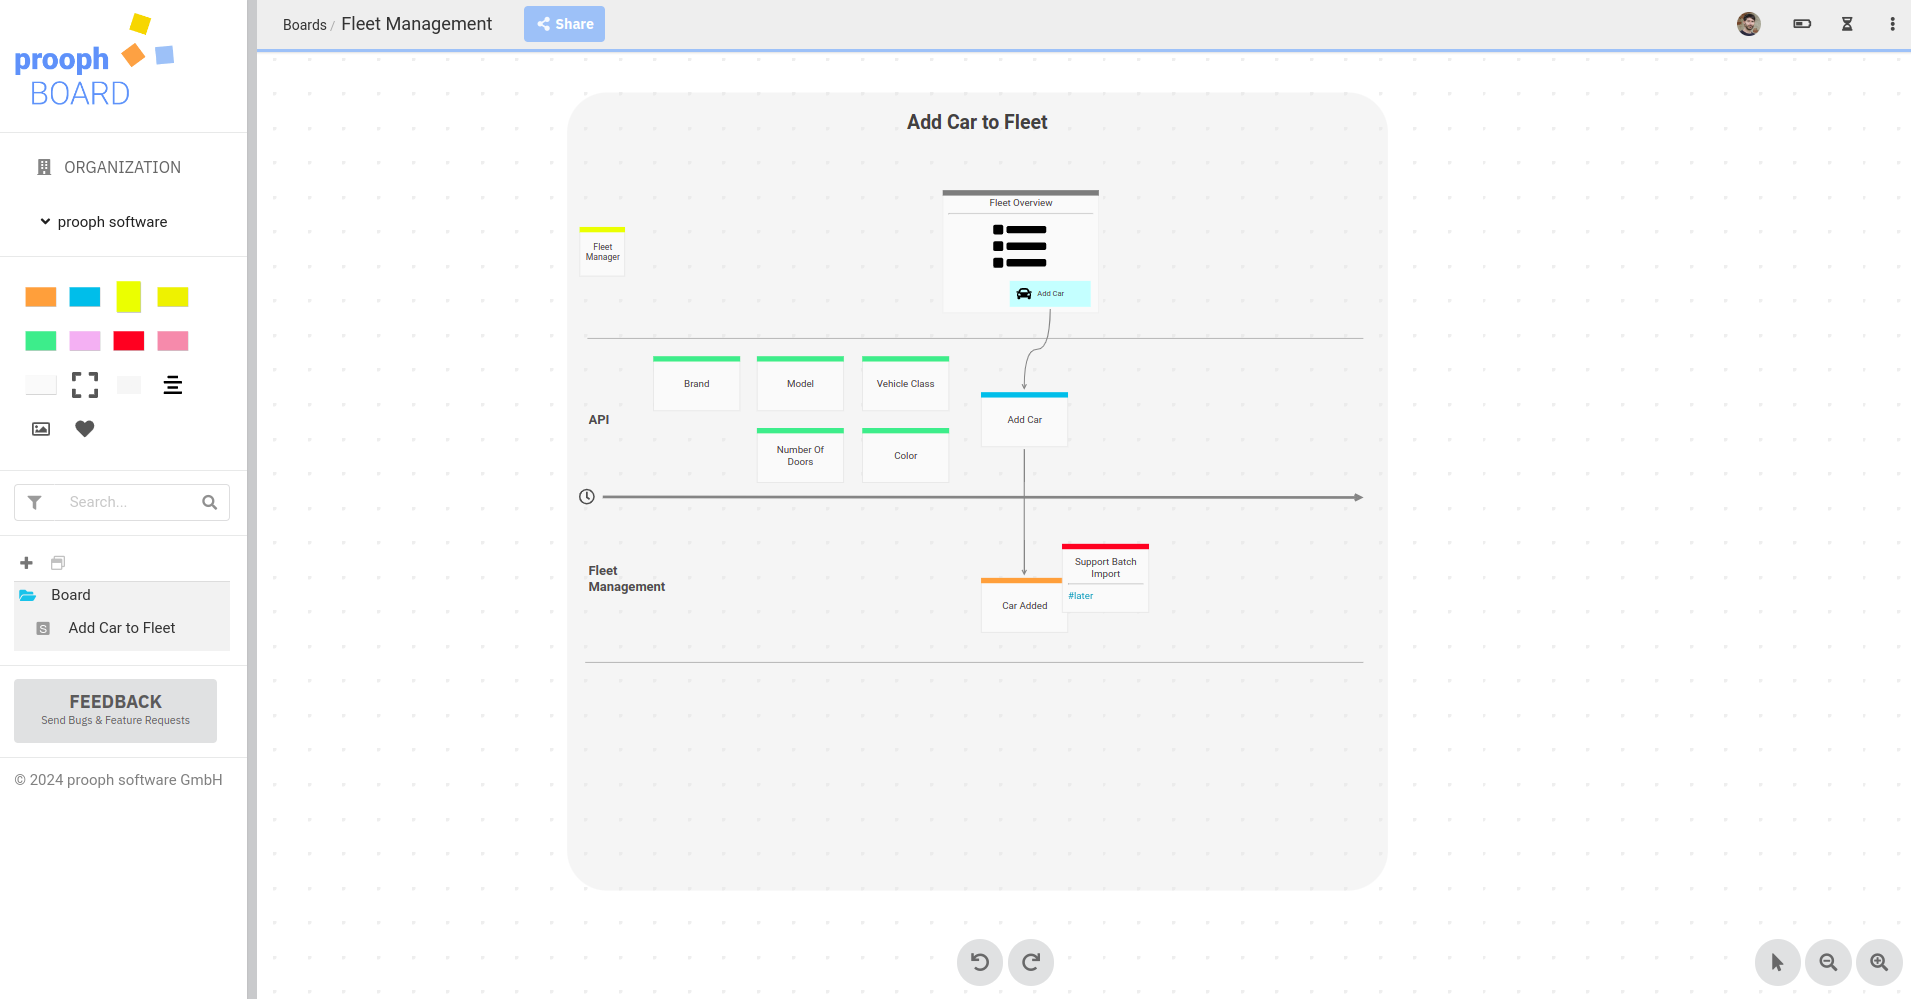
The Fleet Manager wants to add a car to the fleet. This intention is represented as a Command Card placed in the API lane of the Slice.
When the system accepts and processes the command an event occurs, in our case the Car Added Event. Events are placed in the module lane of the system module where they occur. Here, this is the Fleet Management module.
Input - Which Information
As a next step, we should define which information is needed for the command to be accepted by the system. In a collaboration session the best way to do that is by using an Information Card per field or property. This allows all participants to contribute by adding cards in parallel.
After a collaboration session you might want to clean up the Event Map and structure such information in the Card Metadata
How - Command Handling
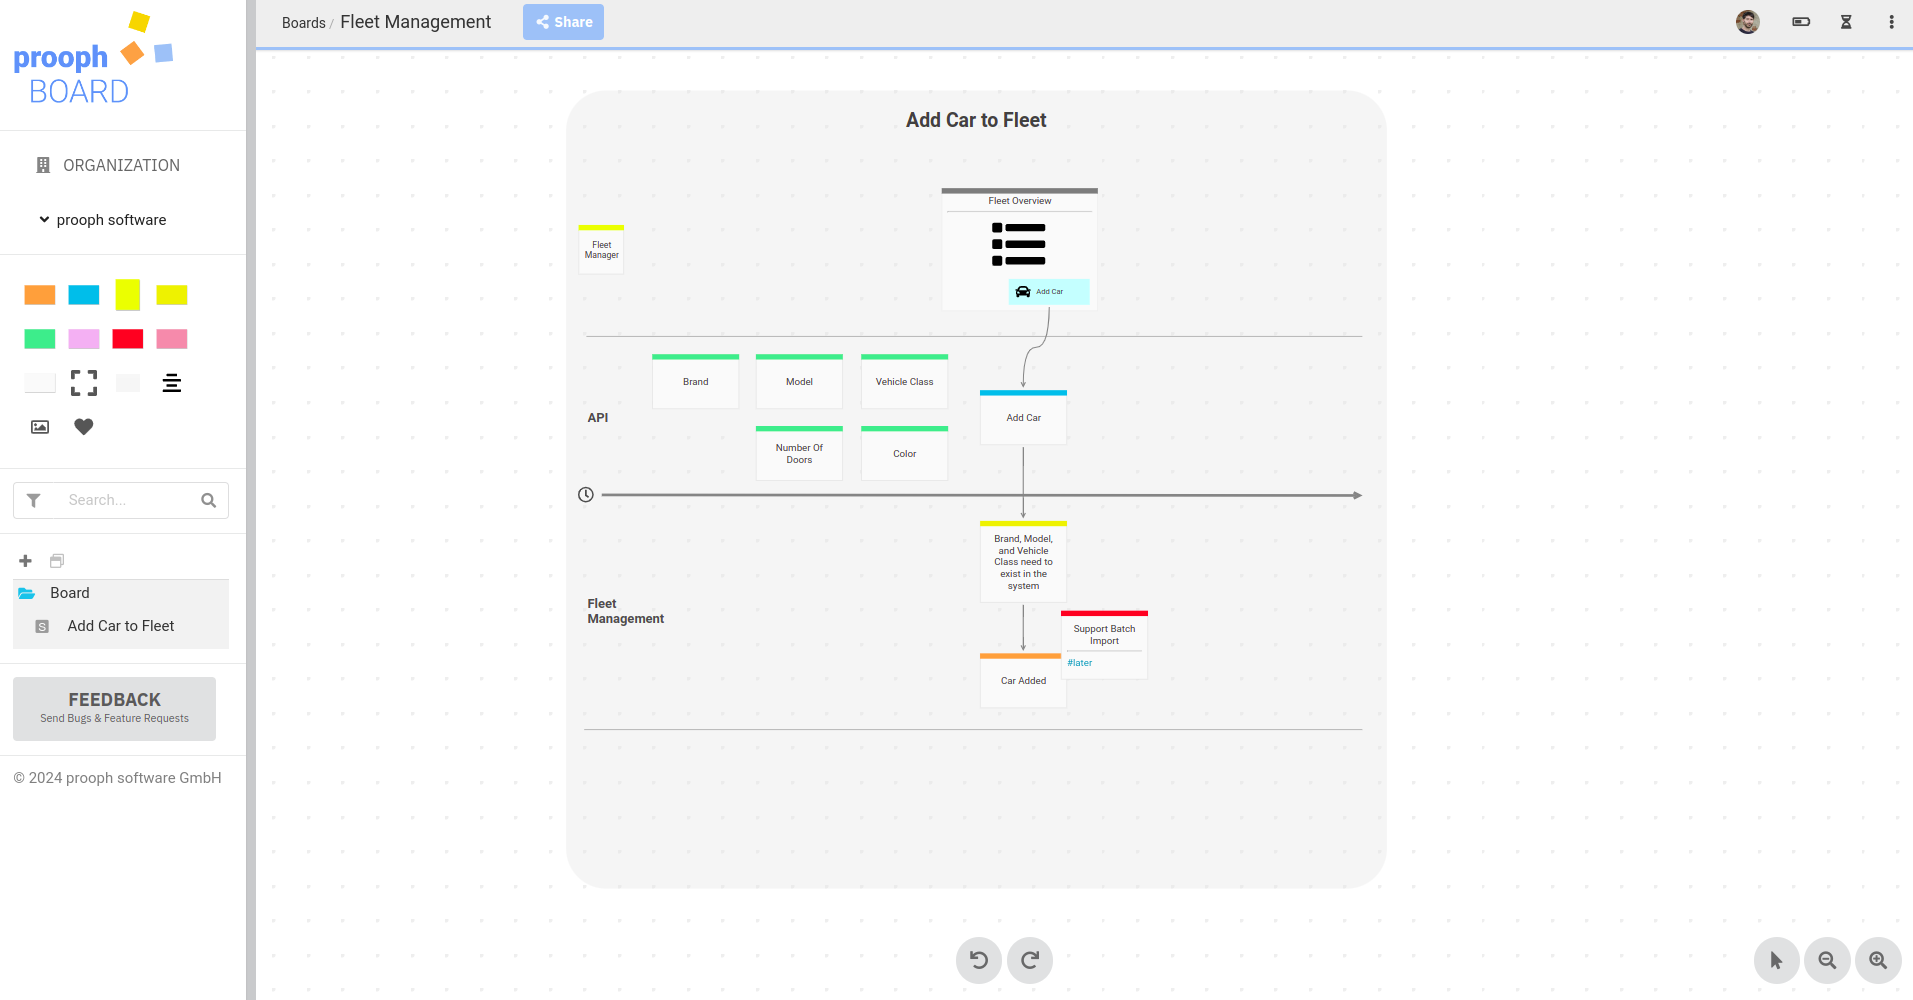
Some service or function in the system needs to handle the command. And for each one you should ask: Do we need to check some rules when handling the command? If the question is answered with yes, write down the rules on a Business Rules Card and place it between command and event in the same module lane as the event.
Output - How does State change
Handling a command usually results in some changed state in the system. The state change is represented by an Event Card (like Car Added here) and the new/changed state (or the new/changed information) can be visualized by using an Information Card again.
One Slice at a Time
As a last step, we should mark the Slice as planned.
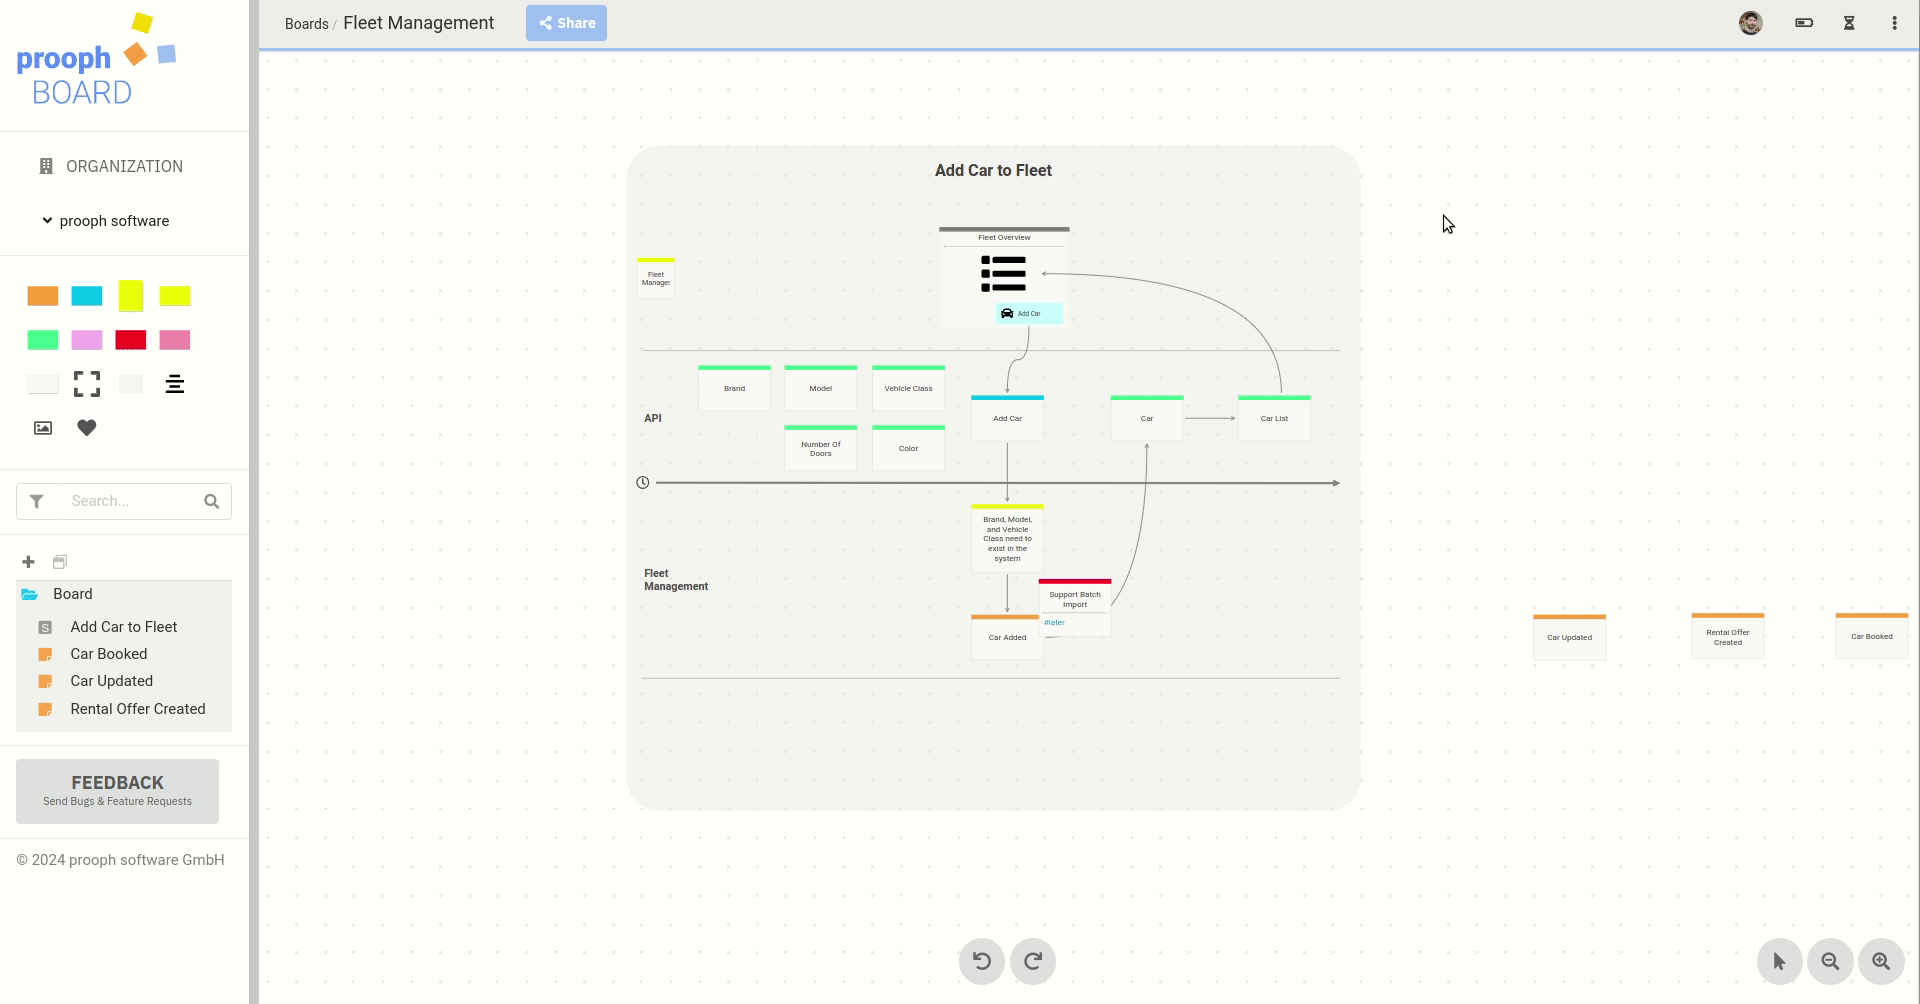
Slices are put along an imaginary timeline from left to right just like we do with events in a Big Picture Event Storming. You might have noticed that the Cards within a Slice are ordered from top to bottom: UI > Command > Business Rules > Event. This illustrates a specific point in time.
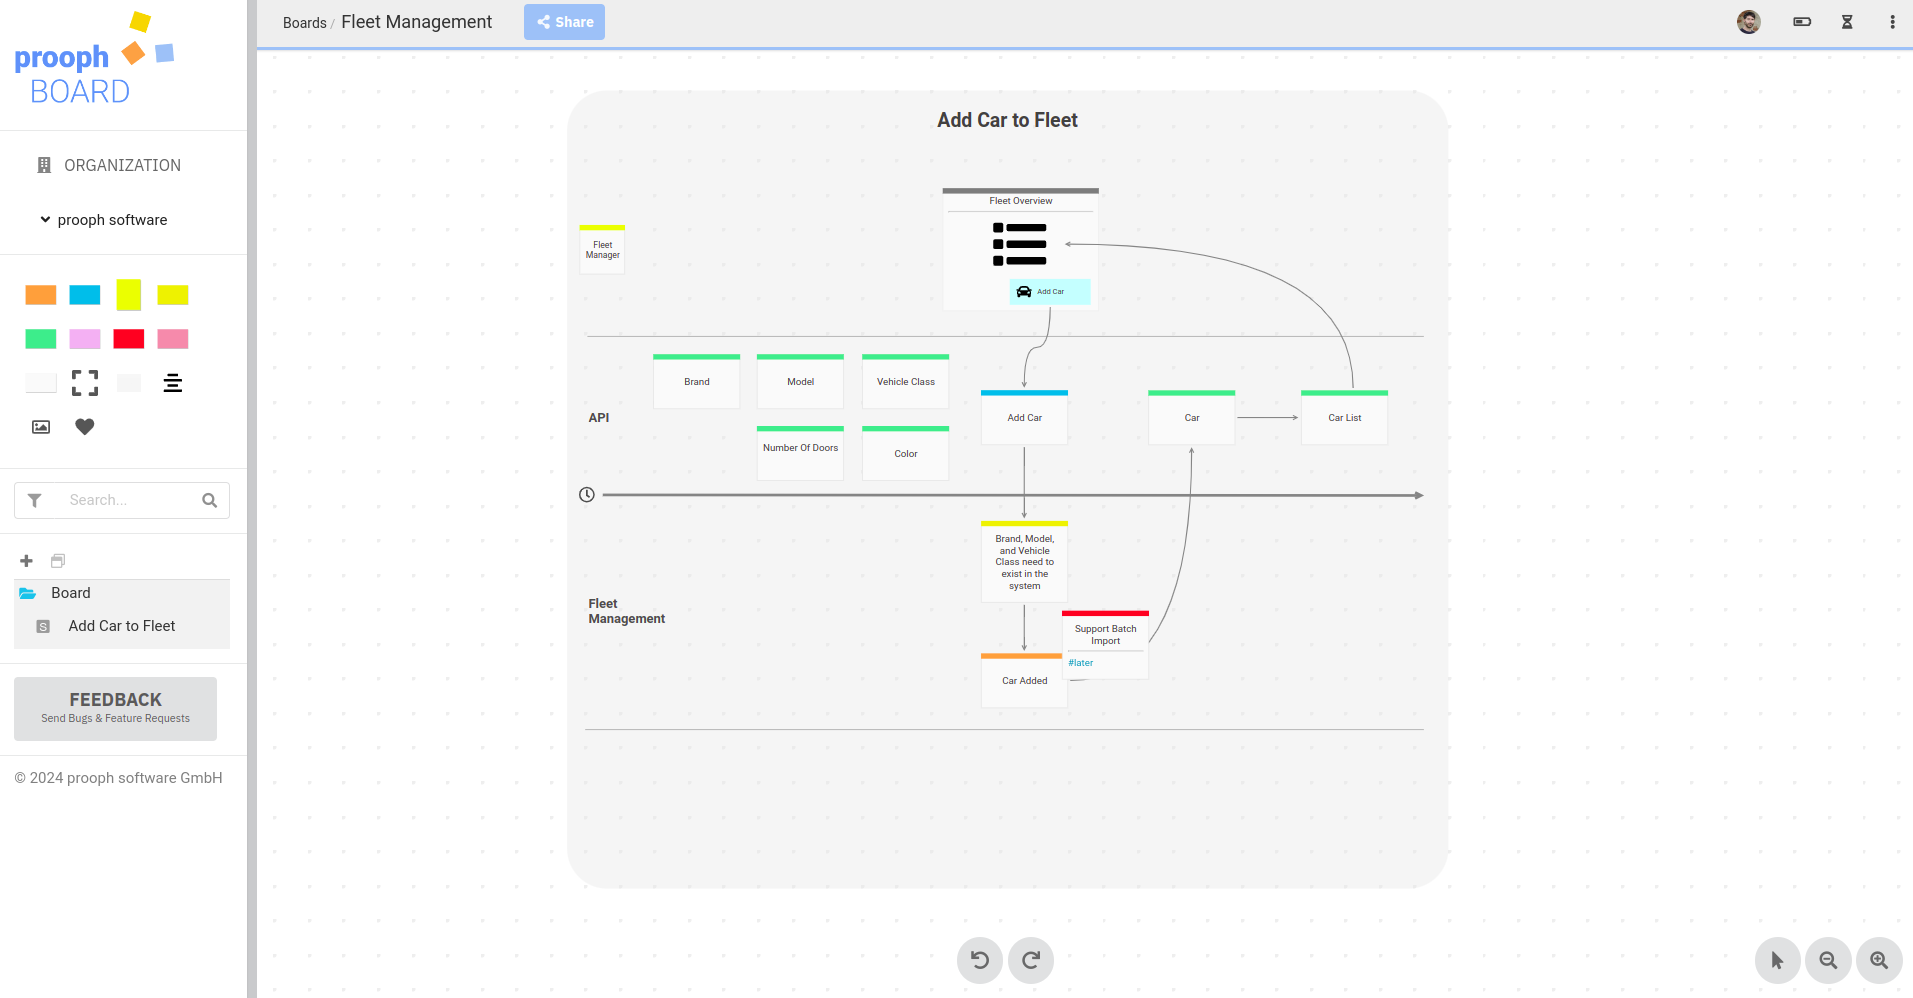
Each Slice should only contain one action (Command > Business Rule > Event) not more. This ensures, that the system as a whole is composed of small, simple building blocks. Connect the Slices through events and/or steps in the UI.
If you strictly follow this rule and learn how to design a system in such a way, you’ll notice after some time that your code is very clean and easy to understand. Refactorings become a no-brainer. You can add new slices as reactions to existing events. You can replace or remove slices. And you can do this for years without increasing complexity. Sure, your system becomes larger, but zoomed-in to a single Slice it will still be as simple as the one we just designed. The Event Map will help you navigate through the system and keep an overview. So make sure that it stays in sync with the implementation.
Story Writing
Story Writing is optional. In fact, you already have all the information on the board, writing it down in a ticket might be useful, but it is not strictly necessary.
Now that we have designed a Slice on prooph board, we can easily create a ticket for it. We use a Github issue here as an example, but this could also be a task in Jira or similar.
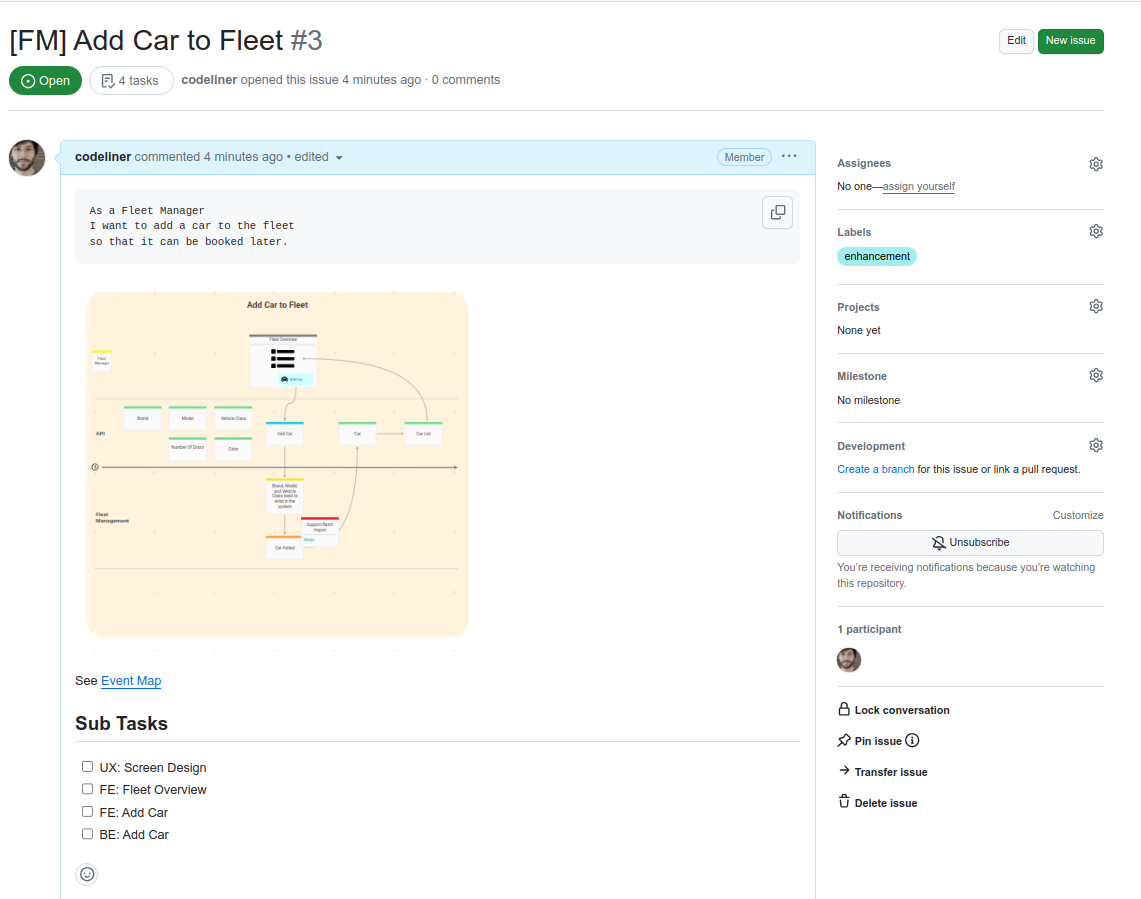
Here is our recommended issue template:
| Section | Description |
|---|---|
| Title | Slice Name |
| User Story | Derive from Actor + Command + Event(s) |
| Image | Make a screenshot of the Slice on proooph board -> paste in issue |
| Link to Event Map | Right click on prooph board Slice -> choose “Direct Link” -> paste in issue |
| Sub Tasks | Split design and development work into small chunks |
With some routine you can create issues using this template in less than a minute. Compare this to your normal story writing and task breakdown sessions 🤯
You can also link the prooph board Slice with the issue by choosing “Link to Task” from the Slice context menu:
Feature Slicing
The key for any system to be maintainable over a long period of time is composition. A complex system should be composed of simple parts. When designing Slices around events, you can use a heuristic to keep them simple:
Too much cards in a single Slice are an alarming signal that the Slice is probably too big.
Let’s have a look at the next event on our Event Map: Car Updated. Sounds like a simple operation, right? But wait, what exactly do we want to update? A design session should give us some insights.
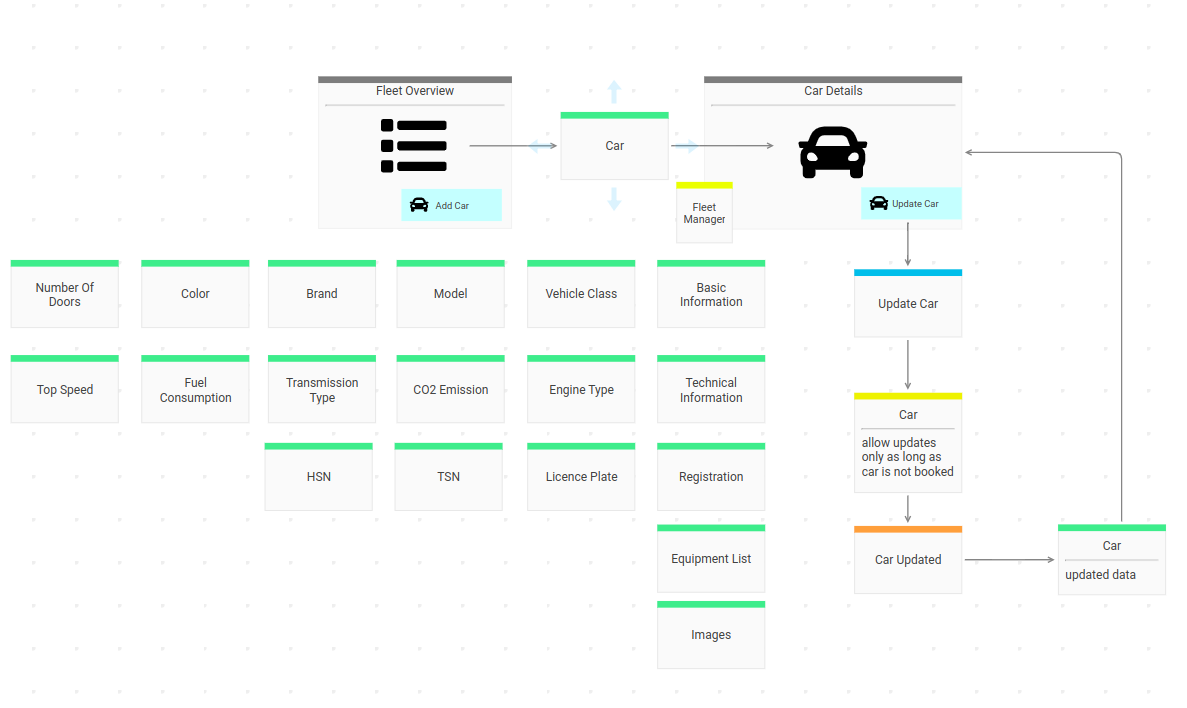
We quickly realize that a car is going to have a lot of information assigned to it. When adding a car, we only focused on a small portion. The update command should support the full set, even thought it’s a lot.
We know that the Fleet Manager will update a car step by step. Not all information is available right from the beginning for example the licence plate or the equipment list. So does it make sense to have this huge update command? Wouldn’t it be better to split the command into smaller chunks and give the task more structure?

So instead of one big update command, we now have 5 distinct commands for updating different parts of a car. Those commands can be represented as 5 tabs in the UI or a 5-step editing process. In the system we gain some benefits from this design:
1. Fine-grained events
If we want to add more automation later, the events can act as triggers. Let’s say we want to run an image optimization process whenever an image is assigned to a car.
To add this feature, you don’t need to touch existing functionality. Just react on Image Assigned events and call it a day!
2. Simple Slices
What if we later discover that car equipment can always be changed no matter if the car is booked or not, but basic and technical information are not allowed to change?
You can adjust the business rule for the Set Equipment command without any risk of introducing a bug in the other commands!
3. Possibility to analyse behavior
We do have the feeling that fleet managers spent a significant amount of time maintaining car information. To validate our assumption we can look at the events and see how often a car is updated until it is ready to be published. We can also see what information is updated last or more often than other information. This can give us an idea how to improve the system and provide a metric to measure if our changes improve the situation or make it worse.
Prototyping
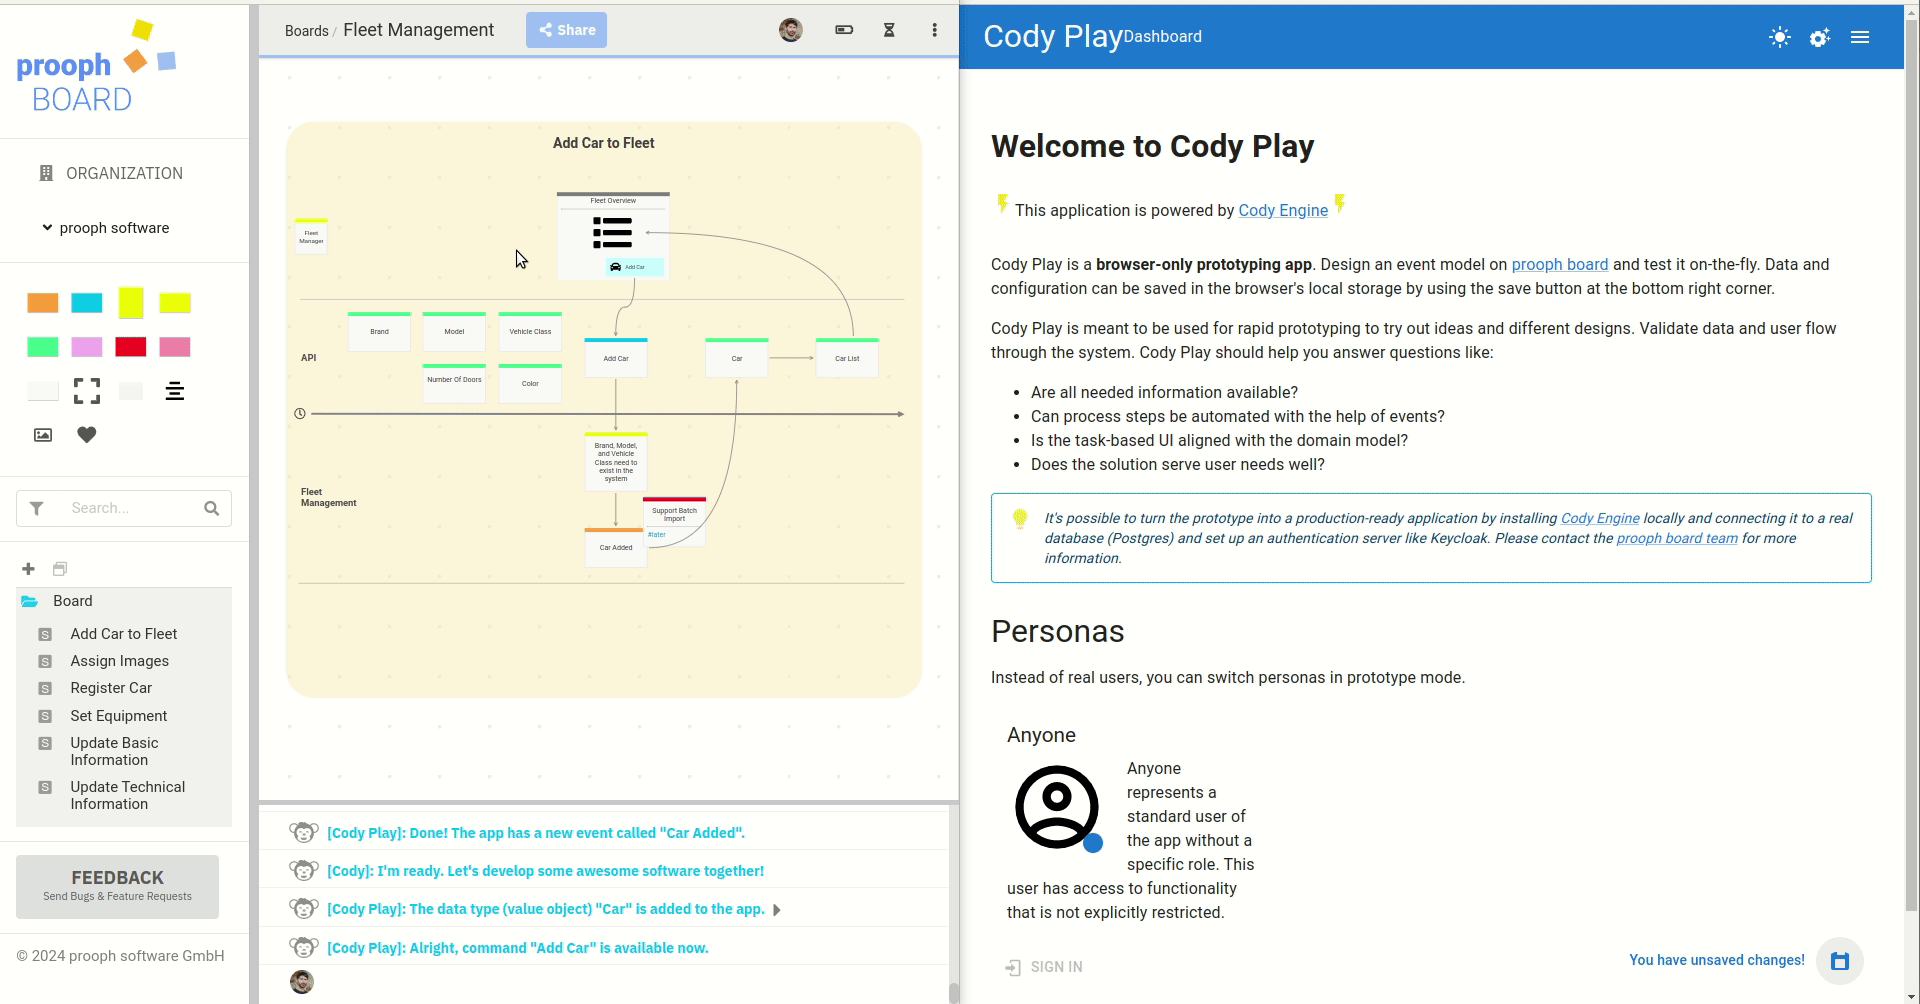
The Event Map is basically a blueprint of the system. You can use Cody Play to translate it into a working prototype.